Imperial Ghar

Author name: imperialghar

Blog

Block Fitting for Your Home: The Essential Guide to Materials and Installation

Block Fitting for Your Home: The Essential Guide to Materials and Installation Block fitting is an essential part of many home renovation and construction projects. Whether you are building a new structure or upgrading an existing one, blocks are used in walls, foundations, and partitions to provide stability, insulation, and durability. With many types of blocks available on the market, choosing the right material and installation process is critical for achieving the best results. In this comprehensive guide, we will walk you through the essentials of block fitting for your home, covering the various types of blocks, their uses, the benefits of each material, and the installation process. By the end of this guide, you’ll have a clearer understanding of block fitting, ensuring your project is completed efficiently and to the highest standard. 1. Understanding Block Fitting Block fitting refers to the process of laying blocks (typically made from materials like concrete, aerated concrete, or other building materials) to create walls, partitions, and even foundations in a building. Block walls are an excellent way to build strong, durable, and long-lasting structures. They can be used in both residential and commercial buildings for interior and exterior walls. Block fitting is a critical component of your home renovation or construction project, as the strength, insulation, and appearance of your walls will depend on the type of blocks used and how they are installed. 2. Types of Blocks Used in Home Construction There are several types of blocks available for home construction, each with unique characteristics and advantages. Let’s explore some of the most common types of blocks used for fitting in homes. Concrete Blocks Concrete blocks are the most commonly used type of blocks in construction. They are made from a mixture of cement, aggregates (like sand and gravel), and water, which is then molded and hardened to form blocks. Concrete blocks come in various sizes and strengths and are ideal for load-bearing walls, foundations, and partitions. Advantages of Concrete Blocks: Strength and Durability: Concrete blocks are incredibly strong and provide excellent structural support. Affordability: Concrete blocks are one of the most cost-effective options for building walls and structures. Fire Resistance: They offer fire resistance, providing an added layer of safety in your home. Aerated Concrete Blocks (AAC) Aerated Concrete Blocks, also known as Autoclaved Aerated Concrete (AAC), are lightweight and energy-efficient blocks made from a combination of lime, cement, water, and aluminum powder. They are expanded during the manufacturing process, giving them a cellular structure that makes them much lighter than regular concrete blocks. Advantages of Aerated Concrete Blocks: Lightweight: Their lightweight nature makes them easier to transport and handle during installation. Excellent Insulation: AAC blocks provide great thermal insulation, helping to keep your home cooler in the summer and warmer in the winter. Eco-Friendly: These blocks are made from sustainable materials and have a lower carbon footprint compared to traditional concrete blocks. Cinder Blocks Cinder blocks, often referred to as breeze blocks, are made from a mixture of concrete and cinder (a byproduct of coal). While they are similar to concrete blocks, they are lighter and more porous. Advantages of Cinder Blocks: Cost-Effective: Cinder blocks are often cheaper than concrete blocks, making them an economical option for various building projects. Versatility: They can be used for both structural and non-structural applications, such as garden walls and partitions. Clay Blocks Clay blocks are made from fired clay and are used primarily in traditional masonry for load-bearing walls and partitions. These blocks have been a staple in construction for centuries due to their natural strength and aesthetic appeal. Advantages of Clay Blocks: Natural Look: They offer a warm, natural look that can complement certain design styles. Insulation: Clay blocks provide excellent sound and thermal insulation. Eco-Friendly: Clay blocks are made from natural materials and are biodegradable. 3. Choosing the Right Block for Your Home Selecting the right block for your home depends on several factors, including the purpose of the wall, the budget, climate conditions, and energy-efficiency needs. For Load-Bearing Walls: Concrete blocks are often the best choice because of their strength and durability. They are ideal for supporting structural loads in both residential and commercial buildings. For Non-Load Bearing Walls: If you are building interior partitions or non-load-bearing walls, lightweight materials such as aerated concrete blocks (AAC) or cinder blocks are great options. They provide insulation and are easier to work with. For Insulation: If energy efficiency is a priority in your renovation project, you may want to opt for aerated concrete blocks or clay blocks, as they offer superior thermal and sound insulation. For Budget-Friendly Projects: If you’re working on a tight budget, cinder blocks offer an affordable option for smaller projects or areas that don’t require high-strength walls. 4. The Installation Process of Block Fitting Installing blocks is not just about laying them down; it requires careful planning and precise execution to ensure that the structure is stable, insulated, and durable. Here’s an overview of the block fitting process. Step 1: Prepare the Foundation Before you begin fitting blocks, ensure that the foundation is ready. The surface should be flat, clean, and level to support the blocks securely. For load-bearing walls, a concrete slab or footing may be required to bear the weight of the blocks. If the foundation is uneven, use a level to check the surface and make any necessary adjustments. Step 2: Mortar Preparation Mortar is used to bond the blocks together. It’s essential to mix the mortar to the correct consistency—too thin, and it will lack strength; too thick, and it will be difficult to apply. The mortar should be spread evenly between each block to create a strong bond and prevent air gaps. Step 3: Laying the First Row of Blocks Start laying the first row of blocks along the foundation, ensuring they are straight and level. This is the most critical row, as it will guide the rest of the blocks. Use a level and measuring tape to make sure the blocks
Blog

Tile Fitting: Choosing the Right Tiles for Your Home Renovation

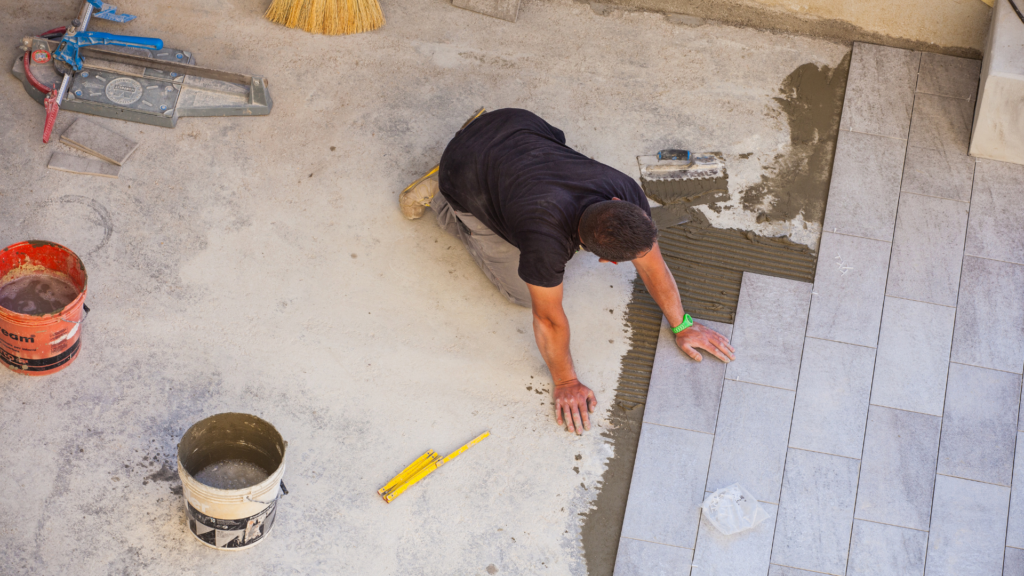
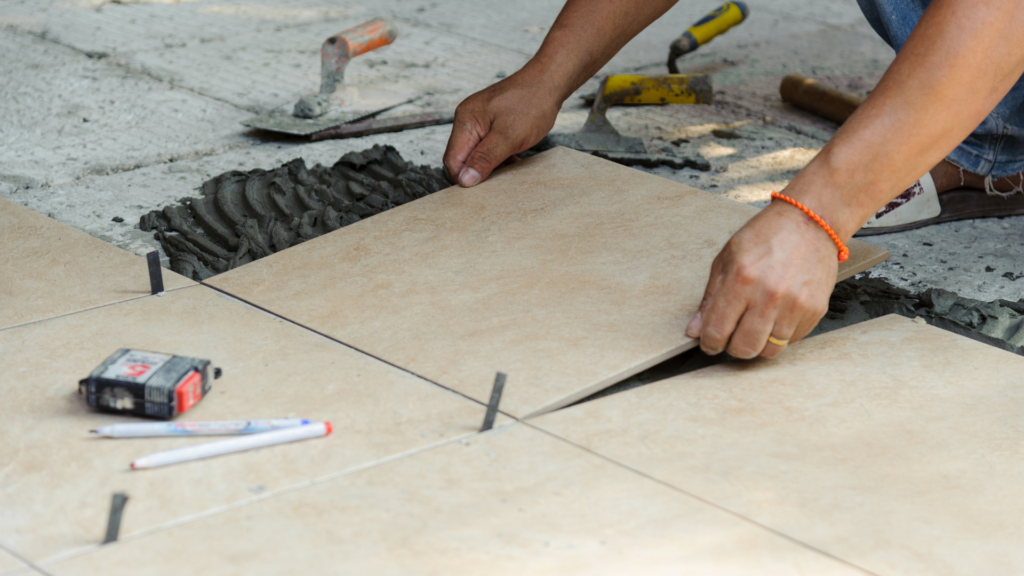
Tile Fitting: Choosing the Right Tiles for Your Home Renovation Tiles are a popular choice for home renovations, offering a versatile solution for both functionality and aesthetics. Whether you’re updating your kitchen, bathroom, or flooring in other areas of your home, choosing the right tiles is essential for creating a space that is both beautiful and practical. With countless styles, materials, and finishes available, the tile selection process can seem overwhelming. However, with a clear understanding of your space, needs, and design goals, you can make informed decisions that will elevate your home and ensure long-lasting results. In this comprehensive guide, we’ll explore the various factors to consider when selecting tiles for your home renovation, from the right material to the perfect design. Let’s dive in! 1. Assessing the Functionality of the Space Before diving into tile aesthetics, it’s important to consider the functionality of the room or area you are renovating. Different spaces in your home have different needs, and this will influence the type of tiles that will work best. High-Traffic Areas: For spaces like entryways, hallways, and kitchens where foot traffic is frequent, it’s important to select tiles that are durable and resistant to wear. Porcelain tiles, which are dense and highly resistant to moisture and scratches, are a great option for these high-traffic areas. Additionally, they come in a wide variety of colors and textures, allowing you to create the look you desire while ensuring functionality. Wet Areas: Bathrooms, showers, and laundry rooms require tiles that can handle moisture without deteriorating. Ceramic and porcelain tiles are excellent choices for wet areas because they’re water-resistant and easy to clean. Furthermore, make sure to choose tiles with anti-slip finishes to prevent accidents in areas that tend to get wet frequently. Outdoor Spaces: If your renovation includes an outdoor area like a patio, garden path, or balcony, make sure to choose tiles designed for outdoor use. These tiles need to be durable and able to withstand changing weather conditions. Outdoor tiles are often made from materials like natural stone, terracotta, or porcelain, and they are engineered to resist fading, cracking, and moisture penetration. 2. Choosing the Right Tile Material Tile materials vary widely in terms of durability, maintenance, and aesthetics. Below are some of the most popular tile materials, each with unique properties and ideal uses. Porcelain Tiles: Porcelain is the most durable and versatile type of tile. Made from a denser clay, it’s ideal for high-traffic areas, as it’s highly resistant to scratches, stains, and moisture. Porcelain tiles are available in a variety of finishes, including matte, glossy, and textured, which makes them perfect for everything from sleek, modern kitchens to rustic bathroom designs. If you’re looking for a low-maintenance, long-lasting option, porcelain tiles are your best bet. Ceramic Tiles: Ceramic tiles are slightly less durable than porcelain, but they are still an excellent choice for most areas of the home. Ceramic tiles are available in a wide range of styles, colors, and patterns, making them an ideal option for both walls and floors. They are particularly popular in bathrooms, kitchens, and entryways due to their water resistance and easy-to-clean surface. Natural Stone Tiles: Natural stone tiles, including marble, granite, slate, and travertine, offer a luxurious, timeless aesthetic. These tiles bring a sophisticated and unique look to any space, as no two pieces of natural stone are the same. However, natural stone tiles require more maintenance than porcelain or ceramic tiles. They must be sealed to prevent staining and damage from water and cleaning products. Natural stone tiles are best suited for areas like living rooms, dining rooms, and bathrooms where you want to create a high-end finish. Glass Tiles: Glass tiles are often used for backsplash areas in kitchens and bathrooms due to their ability to reflect light and create a glossy, clean finish. They come in a variety of colors, shapes, and textures, and they can help brighten small spaces. However, glass tiles can be more fragile than other materials and may not be suitable for high-traffic floors. Glass tiles are often used as accents or borders in combination with other materials. Cement Tiles: Cement tiles are a popular choice for creating bold patterns and vibrant designs. They are made from a mixture of cement and pigments and can be customized to suit a wide range of decorative styles. Cement tiles are ideal for creating statement floors, backsplashes, or accent walls. However, they do require regular sealing to prevent stains and damage over time. 3. Selecting the Right Tile Size and Shape The size and shape of your tiles will play a significant role in the overall aesthetic of the space. When deciding on tile size, it’s important to consider both the style you want to create and the size of the room. Large Format Tiles: Large tiles, typically 12 inches or larger in any direction, are popular for their ability to make a room feel more open and spacious. They create fewer grout lines, making them ideal for creating a clean, seamless look. Large format tiles work particularly well in modern spaces, such as open-plan living areas, bathrooms, and kitchens. Small Tiles: Smaller tiles, such as 2×2 or 4×4, are perfect for creating intricate patterns or adding texture to your design. They are often used for backsplash areas in kitchens and bathrooms or as accent pieces in larger rooms. Small tiles, such as mosaic tiles, can create beautiful focal points or decorative borders, adding personality to your space. Rectangular and Square Tiles: Rectangular tiles, such as classic subway tiles, are highly versatile and work well for both walls and floors. Subway tiles are particularly popular for creating timeless kitchen and bathroom designs. Square tiles, on the other hand, are ideal for traditional or geometric patterns, making them great for areas like entryways or larger bathroom floors. Hexagonal and Unconventional Shapes: For a more modern or trendy look, hexagonal tiles and other unconventional shapes, such as octagonal or triangular tiles, can make a bold statement.

Blog

How to Design a Stylish and Functional Kitchen That Suits Your Lifestyle

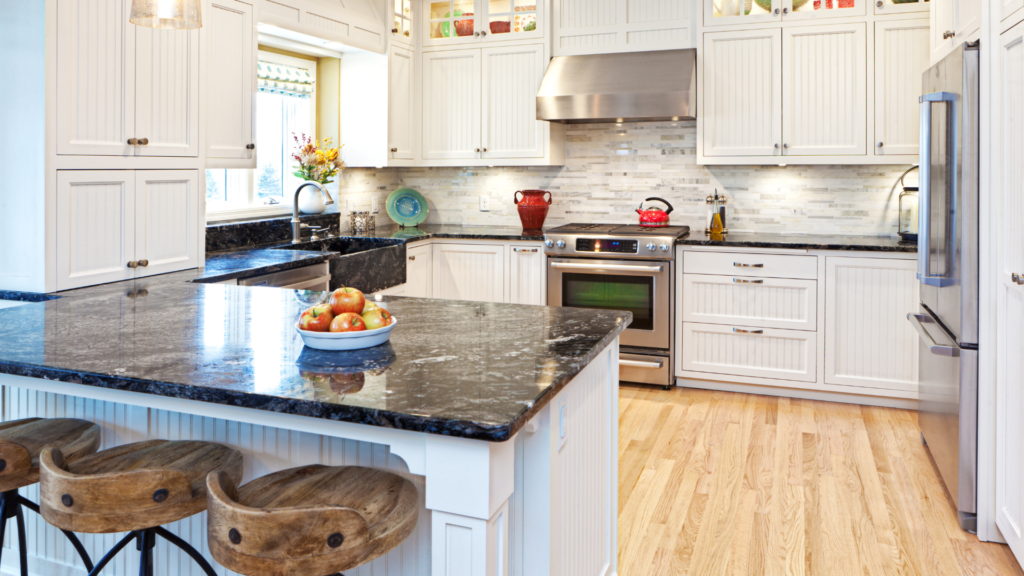
How to Design a Stylish and Functional Kitchen That Suits Your Lifestyle The kitchen is often considered the heart of the home, where meals are prepared, families gather, and memories are made. Designing a kitchen that is both stylish and functional is essential to make the most out of this important space. Whether you love cooking, entertaining, or simply need a space that works for daily tasks, your kitchen should reflect your lifestyle and meet your practical needs. Here’s a step-by-step guide on how to create a kitchen that blends style with functionality. 1. Start with a Clear Vision Before you dive into the details of your kitchen design, take some time to think about how you use your kitchen on a daily basis. Ask yourself: What do I love about my current kitchen? What aspects do I want to change? Do I cook frequently, or do I prefer takeout? Do I entertain often, or is my kitchen more of a private space? By understanding your needs, you can design a kitchen that works for your specific lifestyle. 2. Choose a Functional Layout The layout of your kitchen is the foundation of its functionality. The layout should be designed around the kitchen work triangle, which includes the stove, sink, and refrigerator. These are the areas where you’ll spend the most time, so they should be easily accessible and close to one another. Open Concept: If you love to entertain, consider an open kitchen layout where the cooking area is connected to the living or dining room. This allows you to interact with guests while preparing meals. Galley Style: A galley kitchen is perfect for smaller spaces and offers efficiency in design. It has countertops and appliances on either side, with enough room for one or two cooks to work simultaneously. L-Shaped or U-Shaped: These layouts are versatile and work well in medium-sized spaces. They offer plenty of counter space and can be customized with an island or breakfast bar. 3. Maximize Storage Space Storage is key to a functional kitchen, especially if you’re short on space. To keep your kitchen organized and clutter-free, make sure to incorporate creative storage solutions. Cabinets and Drawers: Use deep drawers for pots, pans, and utensils, and opt for tall cabinets for pantry items. Consider pull-out shelves or lazy Susans to access items in deep cabinets. Vertical Space: Take advantage of vertical space by installing shelves or cabinets that go all the way up to the ceiling. This can provide extra storage for rarely-used items. Built-in Organization: Drawer dividers, pull-out spice racks, and built-in dividers for trays and cutting boards will help keep everything in its place. 4. Incorporate Quality Materials The materials you choose will impact the look, durability, and functionality of your kitchen. Choose materials that will stand up to daily use while also complementing your style. Countertops: Popular options include granite, quartz, and butcher block. Choose a material that is durable and easy to clean, especially around the sink and cooking areas. Cabinet Finishes: Opt for finishes that are easy to maintain and complement the rest of your home’s style. Matte finishes are modern and low-maintenance, while glossy finishes can make a small kitchen feel larger. Flooring: Consider materials like ceramic tile, hardwood, or vinyl that can handle heavy foot traffic and spills. If you have a large family or often entertain, choose flooring that is easy to clean and can withstand wear. 5. Design with Lighting in Mind Good lighting is essential for both the functionality and atmosphere of your kitchen. Layered lighting—using a combination of ambient, task, and accent lighting—is key to a well-lit kitchen. Task Lighting: Place bright task lighting under cabinets or above work areas to provide ample light for cooking and meal prep. Ambient Lighting: This is the main source of light in your kitchen. Ceiling-mounted lights, recessed lighting, or pendant lights can provide soft, even lighting throughout the space. Accent Lighting: Add some personality to your kitchen with accent lighting, like LED strips under the counter or above shelves. This will highlight key features like artwork, cabinetry, or open shelving. 6. Prioritize Functionality with Smart Appliances Today’s kitchen appliances are smarter and more efficient than ever before. When designing your kitchen, choose appliances that fit your needs and make daily tasks easier. Smart Fridge: A smart fridge can help you keep track of your groceries, suggest recipes, and even let you know when items are running low. Dishwasher and Range: Look for appliances that are energy-efficient and suit your cooking habits. If you entertain frequently, a double oven or a larger range may be ideal. Compact Appliances: For smaller kitchens, opt for compact appliances like a slim refrigerator or an induction cooktop to save on space without sacrificing functionality. 7. Create a Statement with Style While functionality is essential, the design of your kitchen should also reflect your personal style. A stylish kitchen is not only a pleasure to cook in but also a space that enhances your home’s overall aesthetic. Cabinet Color and Finish: Choose colors and finishes that match the mood you want to create. For a modern kitchen, opt for sleek, minimalist cabinets in neutral tones. For a warmer, rustic feel, go for wooden cabinetry or a vintage-inspired look. Backsplash Design: The backsplash is an opportunity to add a pop of color or texture to your kitchen. Consider using subway tiles, mosaic patterns, or even marble for a more luxurious touch. Open Shelving: If you love showcasing your kitchenware, open shelving can provide a stylish and functional way to store plates, glasses, and cooking utensils. 8. Consider Sustainability As you design your kitchen, think about incorporating sustainable materials and energy-efficient appliances. This not only reduces your carbon footprint but can also save you money in the long run. Eco-Friendly Materials: Choose materials like bamboo, recycled glass, or reclaimed wood for countertops and flooring. These options are sustainable and add character to your kitchen. Energy-Efficient Appliances: Look for appliances with the ENERGY STAR

Blog

Small Bathroom, Big Impact: Tips for Renovating Your Bathroom on a Budget

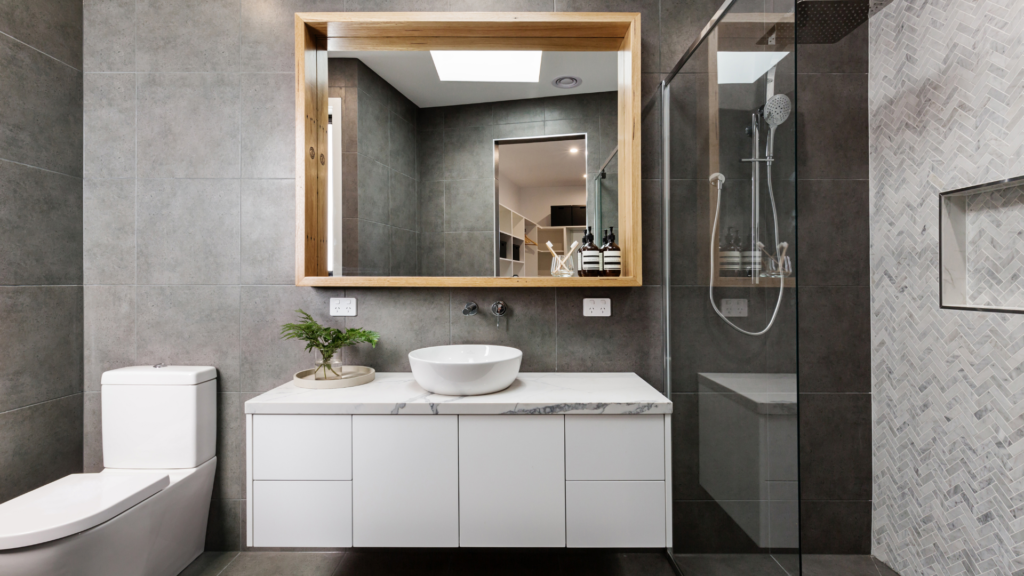
Small Bathroom, Big Impact: Tips for Renovating Your Bathroom on a Budget Renovating a small bathroom can seem like a daunting task, especially when you have a tight budget. However, with some creativity and smart choices, you can transform your small space into a stylish, functional retreat without breaking the bank. Whether you want to refresh your existing decor or completely overhaul your bathroom, here are some budget-friendly tips to make a big impact on your small bathroom renovation. 1. Focus on Paint One of the easiest and most affordable ways to transform your bathroom is with a fresh coat of paint. The right color can make the space feel larger, brighter, and more modern. Choose Light Colors: Lighter shades, such as soft whites, light grays, or pastels, can make your bathroom feel more spacious and airy. Consider Accent Walls: If you want to add some drama, consider painting one wall with a bold color or pattern. This can give your bathroom a stylish focal point without costing much. 2. Update Fixtures and Hardware Replacing outdated fixtures and hardware is a simple way to give your bathroom a modern look. You don’t have to replace everything—sometimes, just changing a few key items can make a huge difference. Swap Out Old Faucets: A new faucet can make your sink or bathtub look fresh and updated. Opt for sleek, contemporary designs that match your bathroom’s style. Upgrade Cabinet Hardware: Replacing old drawer pulls, knobs, and handles with something more modern or stylish can completely change the look of your vanity. 3. Consider Peel-and-Stick Tiles Tiling can be expensive, especially if you hire professionals. Instead, consider peel-and-stick tiles, which are affordable, easy to install, and come in a variety of designs. Affordable Alternatives: Peel-and-stick tiles come in a range of styles, including subway tiles, marble, or mosaic patterns. They are a great budget-friendly option for adding texture and pattern to your walls or floors. DIY-Friendly: Installation is easy enough for most DIY enthusiasts, saving you money on labor costs. 4. Maximize Storage with Creative Solutions Small bathrooms can often feel cluttered due to a lack of storage space. Finding creative storage solutions can help you stay organized and make the room feel more spacious. Wall-Mounted Shelving: Install floating shelves or cabinets above the toilet or near the sink. These can hold towels, toiletries, and other essentials without taking up floor space. Storage Baskets: Use stylish baskets or containers to store toiletries under the sink or on shelves. This will help keep your bathroom neat without the need for expensive cabinetry. 5. Replace the Shower Curtain A shower curtain is an inexpensive update that can completely change the feel of your bathroom. Choose a curtain that complements the rest of your decor and adds style. Go for Bold Patterns: A patterned or textured shower curtain can add a splash of personality to your small bathroom. Upgrade to a Quality Curtain: Invest in a good-quality, water-resistant shower curtain for durability and to enhance the overall look of your bathroom. 6. Add a Mirror to Create the Illusion of Space Mirrors can make a small bathroom feel much larger by reflecting light and creating the illusion of depth. Large Mirrors: Consider adding a large mirror above the sink or vanity. A bigger mirror will not only help the space feel bigger but also brighten up the room. Mirrored Accessories: If you don’t want a large mirror, opt for smaller mirrored accessories, like framed mirrors or mirrored shelves, which still offer the reflective effect. 7. Use Smart Lighting Proper lighting can completely transform the look and feel of your bathroom. On a budget, it’s important to make the most of your lighting options. Add Layered Lighting: Use a combination of overhead, task, and accent lighting to create a well-lit space. Consider adding a dimmable light fixture above the mirror for more flexibility. Install LED Lights: LED lights are energy-efficient and long-lasting. Opt for LED vanity lights or LED strips for a modern, cost-effective option. 8. Repurpose and Refinish Existing Features Rather than replacing entire fixtures, consider refinishing or repurposing what you already have. Refinish the Bathtub: If your bathtub is old but still in good condition, you can refinish it instead of replacing it. There are DIY kits available that can restore the surface to like-new condition. Paint or Refinish the Vanity: A simple coat of paint or a new finish on your bathroom vanity can make it look brand new. You can even add new hardware to enhance the look. 9. Add Personal Touches Small accessories can make a big impact, and they don’t have to be expensive. Decorative Towels: Invest in a set of new, high-quality towels. Towels in vibrant colors or patterns can add warmth and texture to your bathroom. Wall Art: Consider adding some inexpensive wall art or prints that reflect your personal style. Small framed prints, photos, or even DIY artwork can elevate the space without costing much. 10. DIY Where You Can If you’re handy, there are plenty of DIY projects that can save you money during your bathroom renovation. Painting and Tiling: As mentioned before, painting and peel-and-stick tiling are easy DIY projects that can make a big difference. Installing Shelves or Hooks: With basic tools, you can install floating shelves or hooks to increase storage and enhance the decor. Conclusion Renovating a small bathroom on a budget is possible with the right planning and creativity. By focusing on easy updates like paint, lighting, and fixtures, and incorporating affordable alternatives such as peel-and-stick tiles or DIY projects, you can transform your bathroom into a stylish and functional space without overspending. With these tips, you’ll be able to create a bathroom that feels luxurious, no matter the size or budget. This approach makes the process of renovating a small bathroom feel manageable and affordable, ensuring that anyone can achieve a big impact without a huge price tag.

Blog

The Do’s and Don’ts of Terrace Renovations

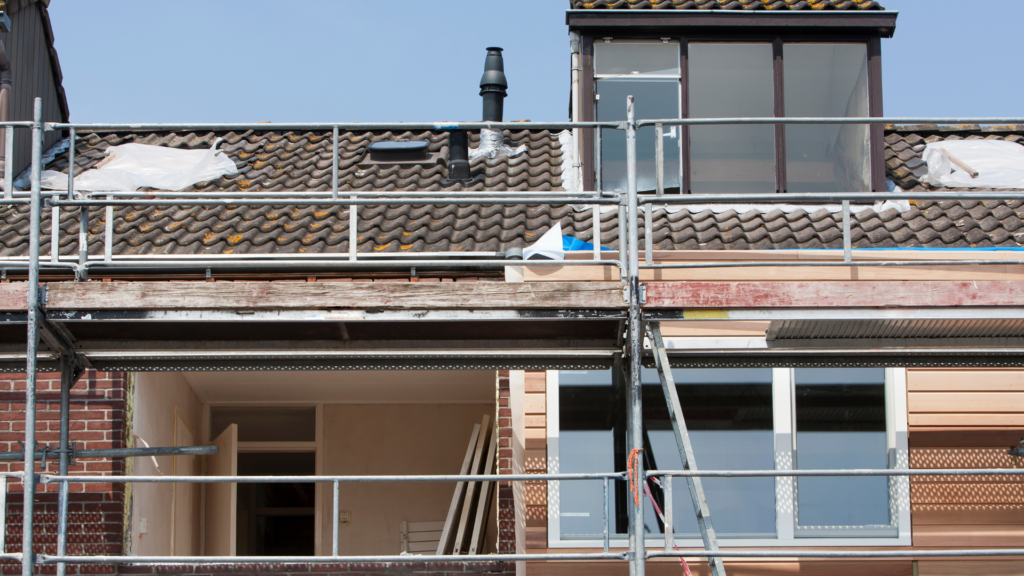
The Do’s and Don’ts of Terrace Renovations Terrace renovations can be a great way to enhance your outdoor living space, providing a comfortable and stylish area for relaxation, dining, or even entertainment. Whether you’re aiming to revamp a small balcony or overhaul a larger terrace, careful planning and execution are key to a successful transformation. However, it’s equally important to know what to do—and what to avoid—during your renovation process to ensure both aesthetics and functionality. In this guide, we’ll explore the essential do’s and don’ts of terrace renovations to help you achieve the best results. The Do’s of Terrace Renovations 1. Do Plan for the Weather Before you begin any renovation work, consider the climate and weather conditions in your area. Your terrace will be exposed to the elements, so it’s essential to select materials and designs that can withstand your local climate. Waterproofing: Make sure to invest in high-quality waterproofing for the flooring, walls, and any other surfaces that might come in contact with water. This will prevent damage from rain or humidity. Weather-Resistant Materials: Choose durable materials that can handle the sun, rain, and wind. For instance, weather-resistant wood like teak or composite decking, metal furniture, and stone or tile flooring are great choices. 2. Do Create a Functional Layout A terrace is not just about looking good; it should be functional as well. Carefully plan your layout so you can use the space in a way that suits your lifestyle. Consider Zones: Think about how you want to use your terrace. Do you want an area for outdoor dining, a cozy seating corner, or a space for gardening? Creating separate zones within the terrace can help maximize functionality. Flow and Accessibility: Ensure that there is easy access to the terrace from the inside of your home. The flow between the indoor and outdoor areas should feel natural and seamless. 3. Do Consider Safety and Privacy When renovating your terrace, consider both safety and privacy to make the space more comfortable and secure. Railing or Barriers: If your terrace is high above the ground, installing secure railings or barriers is a must. Ensure that they are tall enough to provide safety but also designed to complement the look of your space. Privacy Screens: If your terrace is overlooked by neighbors, privacy screens or trellises with climbing plants can help create a more intimate setting. These additions will make your outdoor space feel more secluded and relaxing. 4. Do Use Low-Maintenance Materials Outdoor spaces can accumulate dirt, debris, and stains over time, so it’s important to select materials that are easy to clean and maintain. Outdoor Fabrics: Opt for outdoor fabrics for cushions and upholstery that are designed to withstand the elements. They should be mildew-resistant and easy to clean. Durable Flooring: Consider low-maintenance flooring options like composite decking, porcelain tiles, or concrete that are not only stylish but also resistant to wear and tear. 5. Do Incorporate Greenery Adding plants to your terrace will help soften hard surfaces and bring life to the space. Greenery is not only visually appealing, but it also enhances the atmosphere by adding natural scents, color, and texture. Potted Plants: Use large pots or planters to introduce vibrant flowers, succulents, or herbs. Vertical gardens and wall-mounted planters are perfect for smaller terraces. Hanging Plants: Create a lush ambiance by hanging plants from the ceiling or terrace railings. The Don’ts of Terrace Renovations 1. Don’t Overcrowd the Space It’s easy to get carried away with the design process, especially when trying to include everything on your wishlist. However, overcrowding your terrace with too much furniture or decor can make the space feel cramped and cluttered. Choose Furniture Wisely: Invest in quality, space-efficient furniture that fits your available space. Avoid large, bulky furniture pieces that will make the terrace feel smaller. Keep It Simple: Sometimes, less is more. Keep your terrace clean and uncluttered with minimal furniture and decor that serve both function and style. 2. Don’t Forget About Drainage Proper drainage is crucial for any terrace renovation. Water that doesn’t drain properly can cause long-term damage, such as mold growth, water stains, and structural issues. Check for Slopes: Ensure that your terrace has the right slope for water to run off. A slight incline can help guide the water to drains and away from the foundation of the building. Install Drainage Systems: If your terrace is flat or has poor natural drainage, consider installing additional drainage systems to prevent water accumulation. 3. Don’t Neglect Lighting Good lighting is essential to making your terrace a usable space after dark. Inadequate lighting can make your terrace feel unsafe and uninviting in the evening. Use Layered Lighting: Consider using a combination of ambient, task, and accent lighting. Soft lighting creates a cozy atmosphere, while task lighting near seating or dining areas helps illuminate specific zones. Energy-Efficient Options: Choose LED lighting or solar-powered outdoor lights to save on energy costs and reduce your environmental impact. 4. Don’t Ignore Local Building Codes Before you start any renovation work, make sure you’re familiar with your local building codes and regulations. Failing to comply can lead to costly fines, delays, or even having to remove completed work. Get Permits: Depending on the scope of your renovation, you may need permits for structural changes, electrical work, or plumbing. Always check with your local council before starting. Check Weight Limits: If you’re planning to add heavy furniture or garden structures, make sure your terrace can handle the additional weight. Consult a structural engineer if necessary. 5. Don’t Overlook Comfort A terrace is meant to be an outdoor retreat, so don’t forget to focus on comfort as much as aesthetics. Consider how you will use the space and ensure it’s comfortable for lounging, dining, or entertaining. Seating Comfort: Select comfortable seating options like lounge chairs, cushioned benches, or even a hammock for a laid-back atmosphere. Weather Protection: If you live in an area with strong sun or frequent rain, consider adding a

Blog

Transform Your Space: The Ultimate Guide to House Renovations

Transform Your Space: The Ultimate Guide to House Renovations Renovating your home can be an exciting yet overwhelming project. Whether you’re looking to update a single room or transform your entire house, the process can be a rewarding journey. Here’s a simple guide to help you make your home renovation as smooth and successful as possible. 1. Plan Ahead The first step in any renovation is planning. Before you start, think about what you want to achieve. Are you looking to update your kitchen, modernize your living room, or create a more open floor plan? Set a Budget: Determine how much you can afford to spend. Factor in unexpected costs, as renovations often come with surprises. Make a List: List everything you want to change or improve. This will help you stay focused and organized throughout the process. 2. Get Professional Help While DIY projects can be fun, some renovations require professional expertise. Hiring a contractor, designer, or specialist can help ensure that the job is done correctly and efficiently. Hire the Right People: Look for professionals with experience in the type of renovation you’re doing. Ask for recommendations or check online reviews. Consult a Designer: If you’re unsure about how to arrange your space or choose materials, a designer can help bring your vision to life. 3. Focus on Key Areas When renovating your home, focus on areas that will add the most value and improve your living experience. Here are some key areas to consider: Kitchens: The kitchen is often considered the heart of the home. Updating it can increase your home’s value and make it a more enjoyable place to cook and gather. Bathrooms: A modern, functional bathroom can make a huge difference in your home’s comfort and appeal. Living Areas: Open up spaces and update flooring or lighting to make your living areas feel brighter and more welcoming. 4. Choose the Right Materials The materials you choose can dramatically affect the look and feel of your renovated space. From countertops to flooring, make sure to select durable, stylish materials that fit your budget. Flooring: Whether you choose hardwood, tiles, or carpet, make sure your flooring complements your overall design. Countertops: Materials like granite, quartz, and marble are popular choices for kitchens and bathrooms due to their durability and beauty. 5. Make Smart Changes Not all changes need to be big or expensive. Sometimes, small changes can make a big impact. Paint: A fresh coat of paint can instantly update a room and make it feel brand new. Lighting: Updating light fixtures or adding more natural light can transform the look of any space. Storage: Adding shelves or built-in storage can help organize your space and reduce clutter. 6. Stay on Track Renovations can take time, and things don’t always go as planned. It’s important to stay patient and flexible during the process. Stick to Your Budget: Keep track of expenses to make sure you don’t overspend. Communicate: Regularly check in with your contractor or designer to make sure everything is on schedule and meeting your expectations. 7. Enjoy the Transformation Once your renovation is complete, take time to enjoy your transformed space! Whether you’re hosting a housewarming party or simply relaxing in your new kitchen, you’ll be amazed at the difference a renovation can make. Conclusion A home renovation doesn’t have to be overwhelming if you take it step by step. By planning ahead, hiring the right professionals, and making smart choices along the way, you can transform your space into a beautiful and functional home. Start your renovation journey today and enjoy the results for years to come!

Blog

Top 10 Modern Home Design Trends You Need to Know in 2025

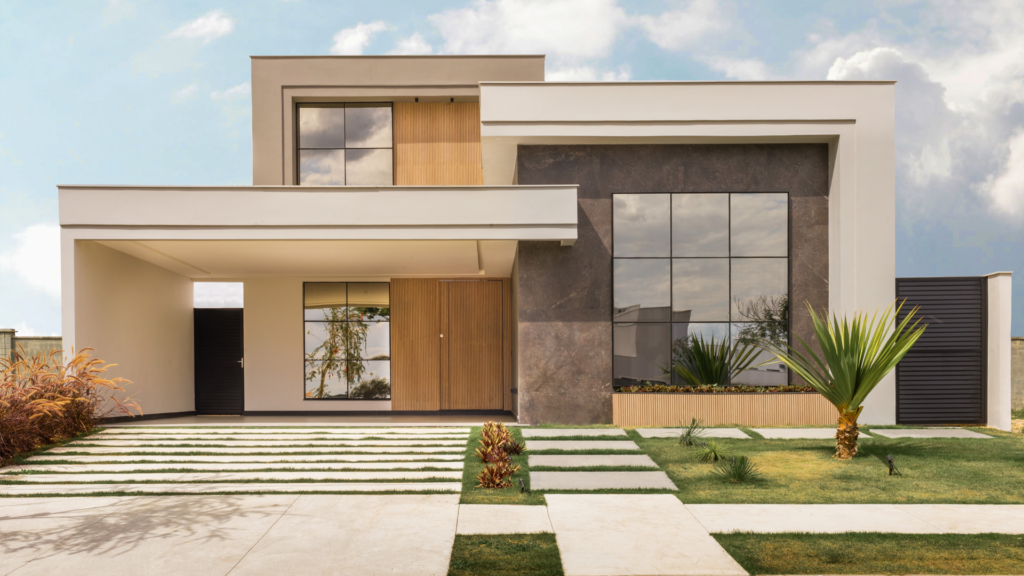
Top 10 Modern Home Design Trends You Need to Know in 2025 The world of home design is constantly evolving, with new ideas and innovations emerging each year. As we approach 2025, homeowners and design enthusiasts are looking for fresh inspiration and the latest trends to make their living spaces not only functional but also stylish and reflective of contemporary aesthetics. From sustainable practices to cutting-edge technology, here are the top 10 modern home design trends that you should know to elevate your space in 2025. 1. Sustainable and Eco-Friendly Design As sustainability continues to gain importance, eco-friendly home design is no longer a trend but a way of life. In 2025, homeowners are becoming more conscious of their environmental impact, and this has led to the rise of sustainable materials, energy-efficient appliances, and green building practices. Natural Materials: Wood, stone, and bamboo are making a comeback, as they are not only beautiful but also eco-friendly. Recycled materials and locally sourced products are also trending. Energy-Efficient Homes: Solar panels, high-performance insulation, and energy-efficient windows help reduce energy consumption and lower utility bills. Adopting these elements into your home design will create a space that’s both stylish and responsible. 2. Biophilic Design: Bringing the Outdoors In Biophilic design, which focuses on incorporating natural elements into interior spaces, continues to grow in popularity. The concept is rooted in the idea that humans have an innate connection with nature, and designing spaces that reflect this can enhance well-being and productivity. Indoor Plants: Large plants, hanging gardens, and vertical greenery walls bring nature inside and improve air quality. Natural Light: Maximizing natural light through large windows, skylights, and glass doors helps to create a serene and welcoming atmosphere. In 2025, biophilic design will be one of the most sought-after trends as people continue to seek calming, nature-inspired environments in their homes. 3. Smart Home Integration Technology is rapidly changing the way we live, and smart home features are becoming an essential part of modern design. In 2025, more homes will feature seamless integration of smart devices, allowing for greater convenience, energy efficiency, and security. Smart Appliances: From refrigerators that tell you when groceries are running low to ovens that can be controlled remotely, smart appliances are taking kitchen design to the next level. Home Automation Systems: Lighting, temperature control, security systems, and entertainment can all be managed through smartphone apps or voice commands. Voice Assistants: Alexa, Google Home, and other voice-activated assistants will be essential for managing household tasks. By incorporating smart technology into your home design, you’ll be embracing the future of living, with systems that enhance comfort and functionality. 4. Open Floor Plans with Defined Spaces Open floor plans have been popular for years, and they continue to dominate in 2025. However, there is a shift toward creating more defined areas within these open spaces. Instead of large, undefined spaces, today’s open plans are structured to provide distinct zones for living, working, and dining while still maintaining an airy and connected feel. Zoning with Furniture: Strategically placed furniture, rugs, and lighting can create boundaries between different areas, making your space feel more organized without sacrificing openness. Partitions and Sliding Doors: Modern partitions and sliding doors allow flexibility, enabling you to open up or close off spaces as needed. This approach allows for better functionality while maintaining the flow and openness that makes open floor plans so desirable. 5. Neutral Color Palettes with Bold Accents In 2025, neutral color schemes will continue to be a staple in home design. Soft tones of beige, gray, and taupe create calming and timeless backgrounds. However, the trend will focus on adding bold accents to inject personality and style into these neutral bases. Vibrant Colors: Think jewel tones like deep emerald, rich cobalt, and mustard yellow used in small doses, such as on accent walls, pillows, or furniture. Metallic Finishes: Gold, copper, and bronze finishes are making their way into kitchens, bathrooms, and living rooms to add a touch of luxury and glamour. Combining neutral colors with bold accents creates a balanced and dynamic aesthetic that remains fresh and sophisticated. 6. Minimalism with a Touch of Warmth Minimalism has been a dominant style for several years, and it will continue to be a major trend in 2025. However, there is a noticeable shift towards adding warmth and texture to these minimalist spaces. The cold, stark aesthetics of minimalism are being replaced with inviting, cozy elements. Natural Materials: Incorporating wood, leather, and wool in furniture and décor adds warmth to minimalist spaces. Layered Textures: Soft rugs, throw blankets, and tactile fabrics bring a sense of comfort and coziness, making minimalist interiors feel more approachable. The combination of sleek, simple design with cozy, textured elements will create spaces that feel open but never cold. 7. Multi-Functional Spaces As more people work from home and lifestyles continue to evolve, multifunctional spaces are becoming essential. In 2025, homes will be designed to adapt to various needs, whether it’s a home office, a gym, or a guest room. Foldable Furniture: Murphy beds, wall-mounted desks, and expandable dining tables allow rooms to be easily transformed depending on the time of day or activity. Flexible Layouts: Modular furniture and adaptable layouts enable homeowners to create spaces that serve multiple purposes. This trend will allow homeowners to make the most of every square foot, especially in smaller homes or apartments. 8. Sculptural and Statement Furniture Gone are the days when furniture was simply functional. In 2025, furniture pieces are expected to be artistic and sculptural, becoming the focal point of a room. Curved and Organic Shapes: Sofas, chairs, and tables with soft, curved lines and organic shapes are gaining popularity, offering a contrast to more angular, boxy designs. Bold, Artistic Pieces: Furniture that serves as both art and utility is trending. Think statement chairs, bold coffee tables, and large-scale light fixtures that make a dramatic impact. Incorporating sculptural and statement furniture into your design can infuse your home with personality and flair. 9. Outdoor

Scroll to Top